Redemption Center
Currency
Remote control, especially when this no ethernet or Wifi in the outdoor, has been a very profound things in the past. When I was a child, I always image that I have an equipment which can control all home appliances. Now, this becomes a reality,with Arduino and GPRS modules and some other related modules. And, it is also quite easy, even for the beginners. Here I will step by step to show you how to remote control your home appliances via the GPRS/GSM SMS and relays.
At first, let me give a brief introduction about relay to you.
Relays are used where it is necessary to control a circuit by a low-power signal (with complete electrical isolation between control and controlled circuits). It acts as a “low voltage controlled switch to control high voltage”, For example, if you want to control power of your washer or air conditioner, which is oftern110v or 220v,by microchip such as AVR or PIC, it is necessary and safe to make your microchip control the relay first, and then control the power supply of those device with the relay.
With the GSM SMS, it is possible to control the relay remotely. You can send a message via phone to control the relay on&off. With this, it will convenient to control any device wirelessly, especially helpfully on irrigation, smart home, outdoor remote control etc.
So, let’s make such a “SMS controlled Relay” with Arduino, GPRS/GSM and a Relay module.
Select the module you need, a Xduino, a GPRS/GSM module and relay module is essential. The GPRS/GSM and relay in “Shield” would be more Convenient if works with Arduino:
The modules I used in this application are as below:
Crowduino
GPRS/GSM Shield
Relay Shield
Notice that the Rated Current of the relay Is important, make sure it meets your requirements. Otherwise it maybe dangerous. Here, I use a 2A rating current relay, which is enough for my application to control a lamp. Usually, home appliances consume currents as below
Device Max current(A)
Electric Fan 1
Lamp 2
TV 2
Refrigerator 2
Microwave Oven 8
Air Conditioner Depends on the power, usually <20
Of course, you will need some tools, such as the Insulating tape, Scissors...
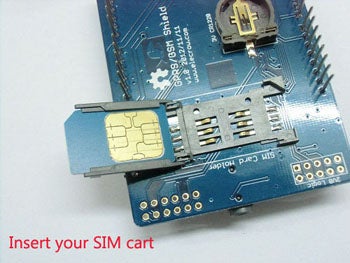
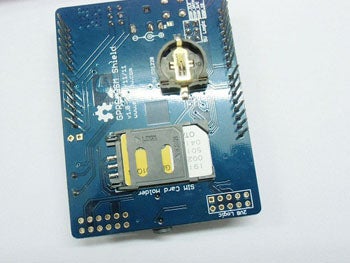
The GPRS module needs a SIM card to work, just the same as a phone. Insert a SIM card to the SIM socket , make sure the SIM is unlocked(that is, it works in your phone). Record the number of SIM Card, it will be used in programming for Arduino.

 Afghanistan